The Funtoo Linux project has transitioned to "Hobby Mode" and this wiki is now read-only.
Difference between revisions of "Windows 10 Virtualization with KVM"
| Line 67: | Line 67: | ||
<syntaxhighlight lang="bash"> | <syntaxhighlight lang="bash"> | ||
#!/bin/sh | #!/bin/sh | ||
export QEMU_AUDIO_DRV=alsa DISKIMG=~/win7.img | export QEMU_AUDIO_DRV=alsa | ||
DISKIMG=~/win7.img | |||
WIN7IMG=~/Downloads/X15-65804.iso | WIN7IMG=~/Downloads/X15-65804.iso | ||
VIRTIMG=~/Downloads/virtio-win-0.1-74.iso | VIRTIMG=~/Downloads/virtio-win-0.1-74.iso | ||
Revision as of 05:10, November 24, 2013
This page describes how to set up Funtoo Linux to run Windows 7 Professional 32-bit within a KVM virtual machine. KVM is suitable for running Windows 7 for general desktop application use. It does not provide 3D support, but offers a nice, high-performance virtualization solution for day-to-day productivity applications. It is also very easy to set up.
Introduction
KVM is a hardware-accelerated full-machine hypervisor and virtualization solution included as part of kernel 2.6.20 and later. It allows you to create and start hardware-accelerated virtual machines under Linux using the QEMU tools.
Kernel Setup
If you are using an automatically-built kernel, it is likely that KVM is already available.
If you are compiling your own kernel, the following kernel config parameters should be enabled (this is based on a 3.x kernel):
Under Processor type and features, enable Paravirtualized Guest Support. Under the Paravirtualized Guest Support menu, enable any options related to KVM, such as KVM paravirtualized clock and in particular KVM Guest Support.
Under the Virtualization category from the main kernel config menu, enable Kernel-based Virtual Machine (KVM) support, and enable at least one type of KVM, either for Intel or AMD processors. It is also recommended to enable Host kernel acceleration for virtio net.
You can use modules or build these parts directly into the kernel. Build your new kernel and modules, and reboot.
Emerge Qemu
First, add the following USE flags to /etc/portage/make.conf
USE="sdl usbredir"
Now, emerge qemu:
root # emerge -av qemu
After qemu and its dependencies have been installed, you are now ready to start setting up your Windows 7 environment.
Windows 7 ISO Images
In this tutorial, we are going to install Windows 7 Professional, 32-bit Edition. Microsoft provides a free download of the ISO DVD image, but this does require a valid license key for installation. You can download Windows 7 Professional, 32 bit at the following location:
http://msft-dnl.digitalrivercontent.net/msvista/pub/X15-65804/X15-65804.iso
In addition, it's highly recommended that you download "VirtIO" drivers produced by Red Hat. These drivers are installed under Windows and significantly improve Windows 7 network and disk performance. You want to download the ISO file (not the ZIP file) at the following location:
http://alt.fedoraproject.org/pub/alt/virtio-win/latest/images/
Create Raw Disk
In this tutorial, we are going to create a 30GB raw disk image for Windows 7. Raw disk images offer better performance than the commonly-used QCOW2 format. Do this as a regular user:
user $ cd
user $ qemu-img create -f raw win7.img 30G
We now have an empty virtual disk image called win7.img in our home directory.
QEMU script
Now, we'll create the following script to start our virtual machine and begin Windows 7 installation. Note that this script assumes that the two ISO files downloaded earlier were placed in the user's Downloads directory. Adjust paths as necessary if that is not the case. Also be sure to adjust the following parts of the script:
- Adjust the name of VIRTIMG to match the exact name of the VirtIO ISO image you downloaded earlier
- Adjust the smp option to use the number of CPU cores and threads (if your system has hyperthreading) of your Linux system's CPU.
Use your favorite text editor to create the following script. Name it something like vm.sh:
#!/bin/sh
export QEMU_AUDIO_DRV=alsa
DISKIMG=~/win7.img
WIN7IMG=~/Downloads/X15-65804.iso
VIRTIMG=~/Downloads/virtio-win-0.1-74.iso
qemu-kvm --enable-kvm -drive file=${DISKIMG},if=virtio -m 2048 \
-net nic,model=virtio -net user -cdrom ${WIN7IMG} \
-drive file=${VIRTIMG},index=3,media=cdrom \
-rtc base=localtime,clock=host -smp cores=2,threads=4 \
-usbdevice tablet -soundhw ac97 -cpu host -vga vmware
Now, make the script executable:
user $ chmod +x vm.sh
Here is a brief summary of what the script does. It starts the qemu-kvm program and instructs it to use KVM to accelerate virtualization. The system disk is the 30GB raw image you created, and we tell QEMU to use "virtio" mode for this disk, as well as "virtio" for network access. This will require that we install special drivers during installation to access the disk and enable networking, but will give us better performance.
To assist us in installing the VirtIO drivers, we have configured the system with two DVD drives -- the first holds the Windows 7 installation media, and the second contains the VirtIO driver ISO that we will need to access during Windows 7 installation.
The -usbdevice tablet option will cause our mouse and keyboard interaction with our virtual environment to be intuitive and easy to use.
Starting Windows 7 Installation
Now, it's time to start Windows 7 installation. Run vm.sh as follows:
user $ ./vm.sh
Windows 7 installation will begin. During the installation process, you will need to enter a valid license key, and also load both VirtIO drivers from Red Hat when prompted (Browse to the second DVD, then win7 directory, then x86).
After some time, Windows 7 installation will complete. You will be able to perform Windows Update, as by default, you will have network access if your host Linux system has network access.
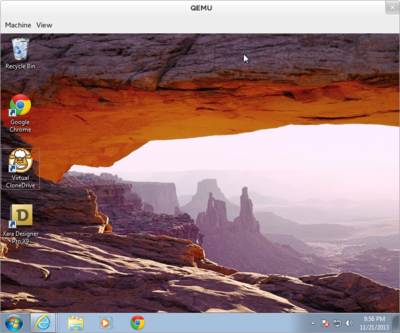
Enjoy your virtualized Windows 7 system!
