The Funtoo Linux project has transitioned to "Hobby Mode" and this wiki is now read-only.
Virtual PDF Printer
On Funtoo, it is possible to create a Virtual PDF Printer, which will send the ”printed” content into a PDF, as opposed to a physical printer. All you need to do is to follow these simple steps:
Getting the necessary software
Emerge the following packages:
root # emerge -av net-print/cups net-print/cups-pdf net-print/cups-filters
Starting the CUPS Server
root # /etc/init.d/cupsd start
The CUPS server can be controlled and configured from the command line with a bunch of utilities included in the package. But it also comes with an http server, providing a very convenient web interface, which can even be remotely accessed.
Running the CUPS Web Interface
For the purpose of this howto, we will assume that you are working from the computer where the CUPS server is installed and running. Under those conditions, you should be able to access your server configuration just by pointing your browser at http://localhost:631. You will be greeted with the following content:
Adding a New Printer
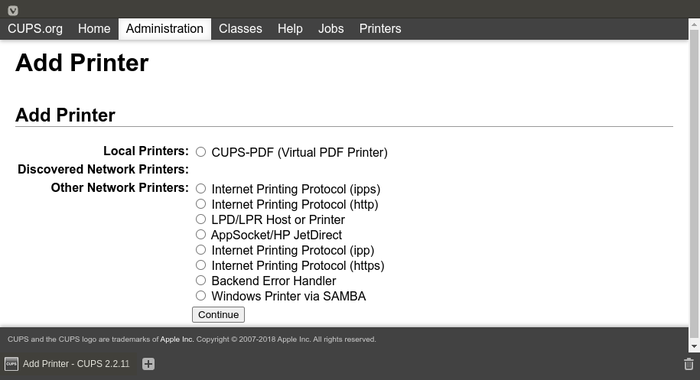
On the top menu, click on “Administration” and then, under the title ”Printers”, click on “Add Printer”. You will be presented with different options, according to how you intend to connect your printer.
The first option, in this case is “CUPS-PDF (Virtual PDF Printer)”. That's the one we are going to choose. By the way, you only see that option on this menu because you have the package net-print/cups-pdf installed. If you don't see it, check if net-print/cups-pdf is correctly installed, and if need to reinstall for some reason, restart the cupsd service.
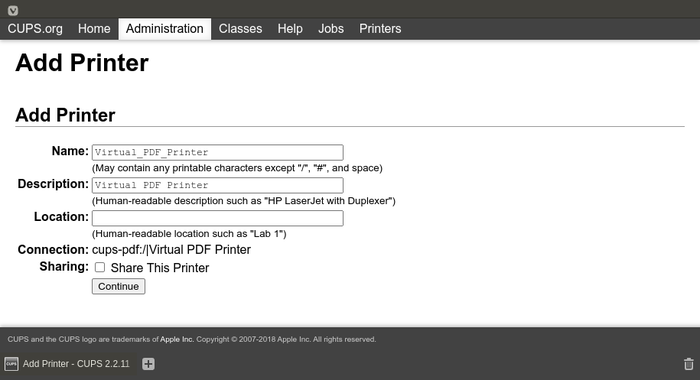
Choose “CUPS-PDF (Virtual PDF Printer)” and press Continue. You will the screen below:
This is where you set the name this printer that will be shown when you select a printer from an application or when you connect to it from the Network. You can just leave the name suggested if you like it. You can also check the Share This Printer box if you'd like to make your PDF printer available for other computers on the network. Just bear in mind that the PDF will be produced and saved on the computer that is running the server, not on the one that is using the printer remotely.
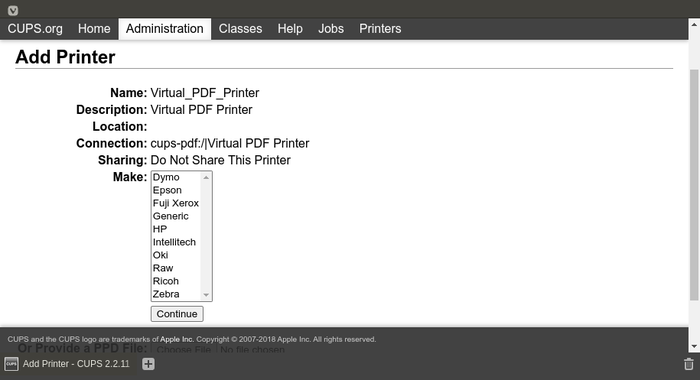
Click on “Continue” to go to the next page.
Here you will chose the make of your printer. Choose ”Generic”.
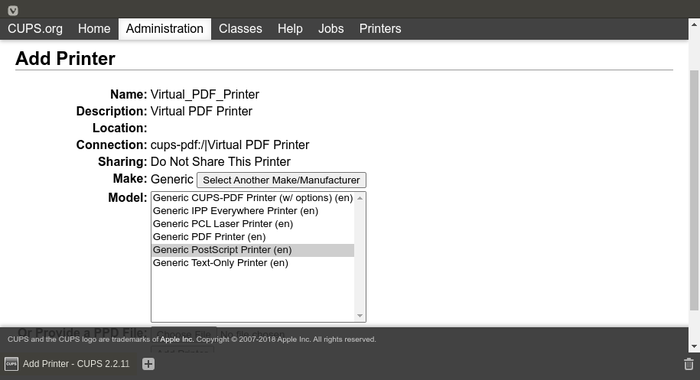
Then, you need to choose a driver for your printer. You see in the list below that there are 2 drivers with PDF in the name. You need to choose “Generic PDF Printer (en)”. If you don't see this option, make sure you have the package net-print/cups-filters correctly installed, restart the cupsd service and try again.
Choosing the Correct Driver
Click on “Add Printer” and configure your default printing options in the next page. You will be taken to your new printer maintenance page, where you should see that your printer is accepting jobs. If that is the case, then your PDF printer is ready to be used.
Using Your New PDF Printer
You can use this printer from any software that has support for printing using CUPS, which is most Linux desktop applications, like your favorite browser or word processor.
The PDF files generated by this printer will be stored at /var/spool/cups-pdf/<user name>/ on the server machine.


